Release 2.17.12
User
There have been a number of new features recently that require System Administrator Setup in order for them to work. These include:
- Filtering Selector results
- Default Searches and Easier access to Searches
- Temp Desk - Temps view – Post Code Filtering
- 1 page New Person Wizard
- Quick ‘Left Message Call Back’ contact events
- Filtered last contact date
- GDPR
Improvements to Selector Screens
Filtering Selector results
This feature requires System Administrator set up.
A new single search text box has been added to the top of the Person and Company Selector results screen.
Anything typed in here will filter the on-screen results to rows that include that text value. The filter applies to all visible data.
Changing selector columns
User modified columns
Users can now modify the display of columns they see in most views in IQX. Columns can be moved, and their positions saved.
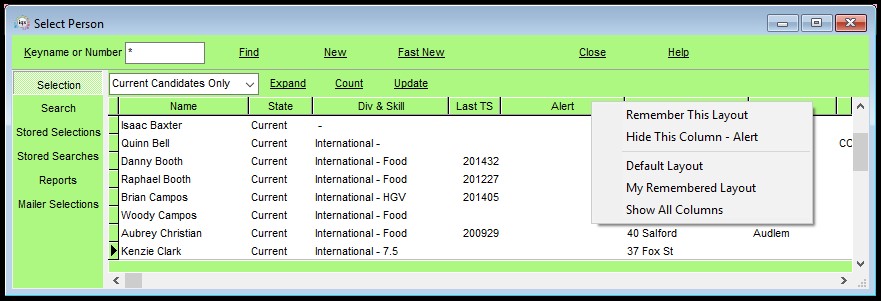
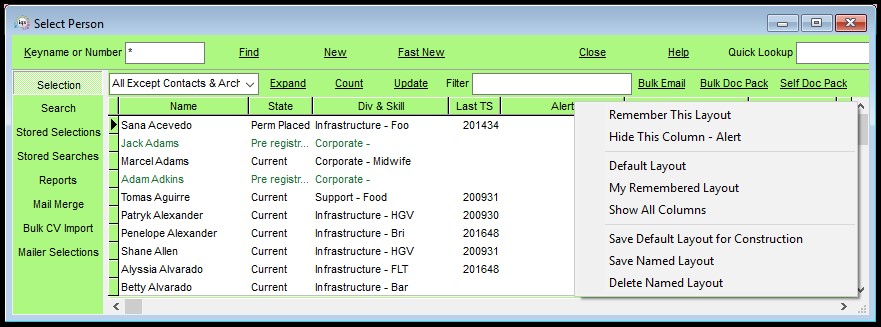
Right clicking on a column will allow users to carry out various actions to customise their views according to their needs.
- Remember This Layout – Stores the current layout for display until changed by the user.
- Hide this Column – Hides the selected column. To ensure this is displayed when logging back in also Select Remember This Layout.
- Default Layout - When selected the default view is visible. If a Departmental layout has been created this will appear.
- My Remembered Layout – the user will see their last Remembered Layout
- Show all Columns – If any columns have been hidden this will restore visibility of them.
Note: This feature does not work on Temp Desk yet as it is not generated the same way.
Some users, depending on their roles setup will be able to see some additional options.
These are:
- Save Default Layout for Users Default department – Saves the designed layout as a default for the User’s department.
- Save Named Layout – Allows the User to create different column layouts for different purposes.
- Delete Named Layout - Allows the User to delete their named layout.
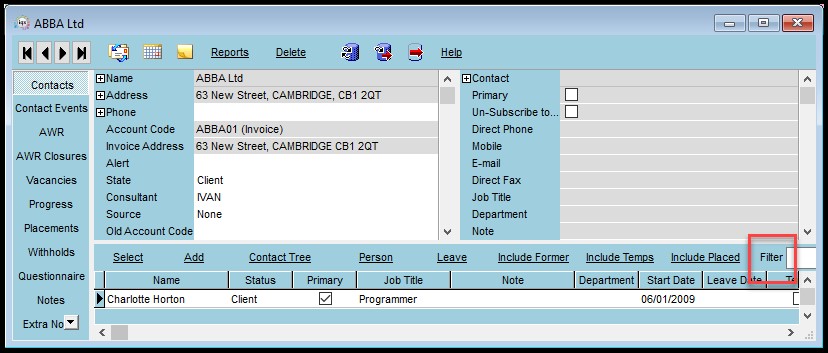
Filter within a view- Company: Contacts, Vacancies, Placements. Vacancy Placements
A new filter box has been added to the above views to allow filtering on any column in this view, e.g.
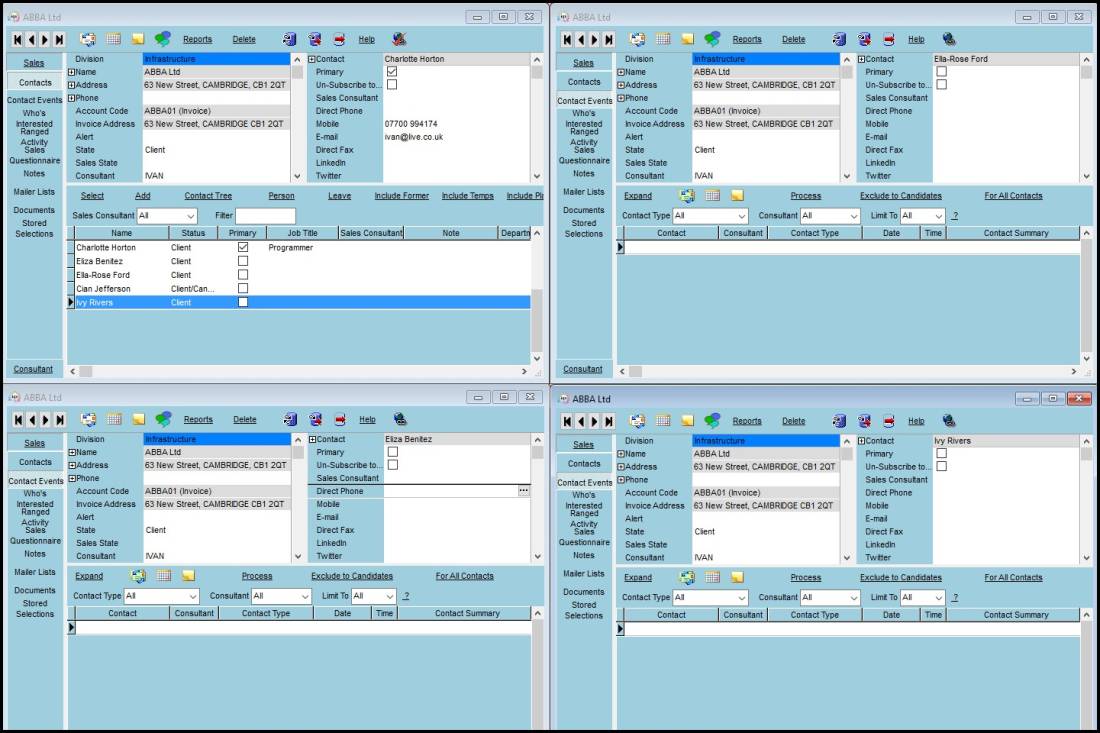
Ability to open a company more than once, with different contacts selected
This is done from the Contacts view, holding down Shift while clicking the Select button or double-clicking the grid row.
A new balloon help on the button explains this feature.
Search criteria box changes
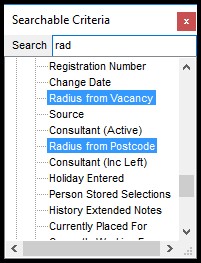
A filter box has been added to the searchable criteria view. When text is added to the box matching criteria are highlighted in blue.
Where tree items have no matching criteria, the search headers will collapse. Where search headers have matching criteria, they will open.
Default Searches and Easier access to Searches
This feature requires System Administrator set up.
In the Person Selector there is a new feature allowing users quick use of standard searches that have been set up per their department.
The searches need to be set up by Sys Admin so that they are displayed in the drop down for use. If one of the Quick Lookup list is chosen,
the search / selection is executed immediately, and the results displayed. Useful for recently registered Candidates, compliance lists, location, skills set.
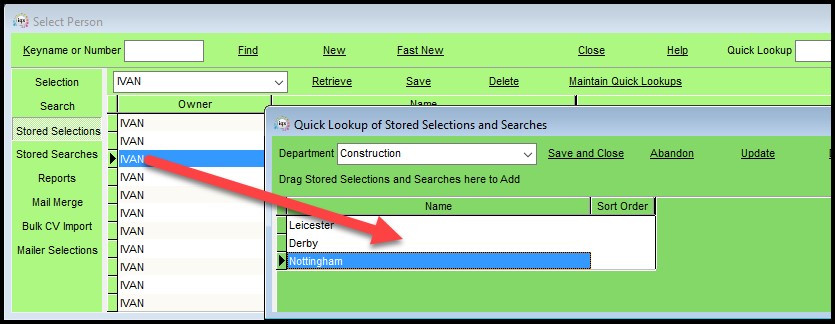
The users with the rights to Setup and maintain the selections do so via the Maintain Quick Lookups form on either Stored Selections or Stored Searches.
Select the department this choice is to be displayed to. The content does not have to be departmentally linked.
To add to the list drag and drop from the main list onto the Quick Lookups form.
A sort order can be added to allow the more frequently used searches/selections to appear at the top of the list.
Temp Desk - Temps view – Filtering
In Temp Desk – Temps a text filter box has been added to allow filtering on data columns. The Weekday columns are not included.
Temp Desk - Temps view – Post Code Filtering
This feature requires System Administrator set up and purchase of the Postcode Distance module.
If you have postcode distance a search box section appears. When a post code is entered in the box and a maximum distance specified the Postcode Distance column
will display the distance for each temp. These can be sorted ascending or descending.
Direct Engagement
This feature requires System Administrator set up (request for a switch submitted)
A new button has been added to Placement – Rates which allows an agency to modify the arrangement between the client and candidate so that when the candidate
is paid directly by the client the agency invoices a fee on the margin rate only.
On selecting Direct Engagement, the placement will display an alternative Rates view, using the Rate Scheme pay band Descriptions but ignoring the amounts, which
will be blank.
The consultant must add the Fee directly into the view. The Fee will be used to create the invoice lines. The Pay and Charge columns are also manually added and are
for Placement information only and will not generate pay in a timesheet.
It is possible to revert Direct Engagement rates back to the Agency Rates by clicking the Revert to Agency Employment button.
The displayed Pay and Charge columns are actually the ExtraRate1 and ExtraRate2 columns and are information only.
Invoicing works as normal using the Fee amount.
1 page New Person Wizard
This feature requires System Administrator set up.
In the person selector it is possible to allow divisions to create a new candidate using a truncated version of the New Person wizard. The button Fast New opens a
one-page wizard.
Quick ‘Left Message Call Back’ contact events
This feature requires System Administrator set up.
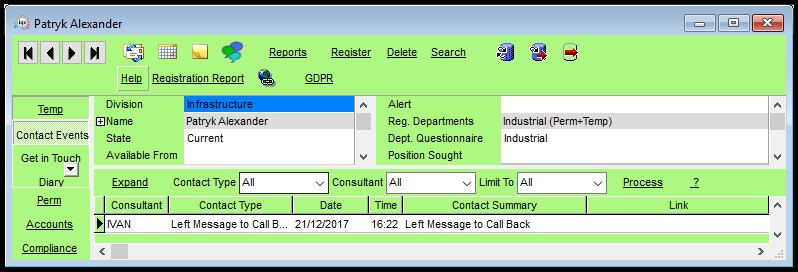
There may be times when a contact event is required to record a contact without the need to add any more detail. For example, ‘Left Message to Call Back’ contact
events.
To speed up saving this type of contact event it is now possible to complete selected contact events in two clicks. The Contact Summary will be automatically populated
with the contact event type text.
Filtered last contact date
This feature requires System Administrator set up.
Some Contact Events types can be set to be deemed a genuine contact. Some calls and emails never get a response and are an attempt at contact rather than valid.
If this is set up for the Agency then searching for Last Contact Event will be for a genuine contact.
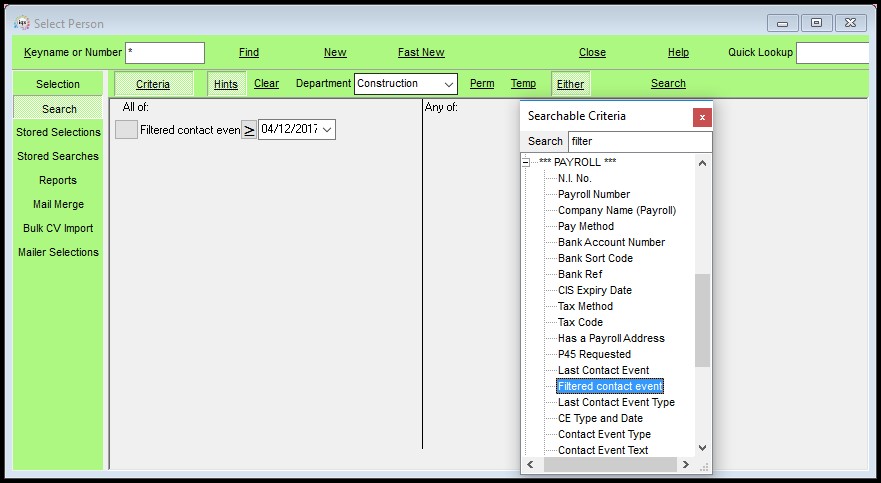
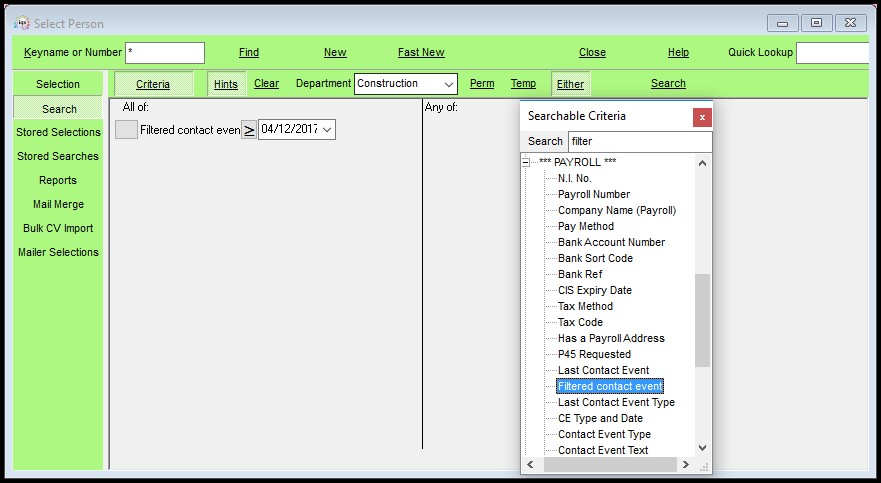
If set up by your system administrator a new searchable item can be added to the search criteria for this information.
e.g.
GDPR
IQX has created a suite of tools available to help agencies meet their data protection responsibilities as part of the upcoming General Data Protection Regulation 2016
due to come into force on 25 May 2018. To maximise the effectiveness of these tools agencies should ensure these tools are incorporated into a robust data
protection procedure.
Only users with the relevant roles and settings will be able to see and use them.
This feature requires System Administrator set up.
Data Access Request Report
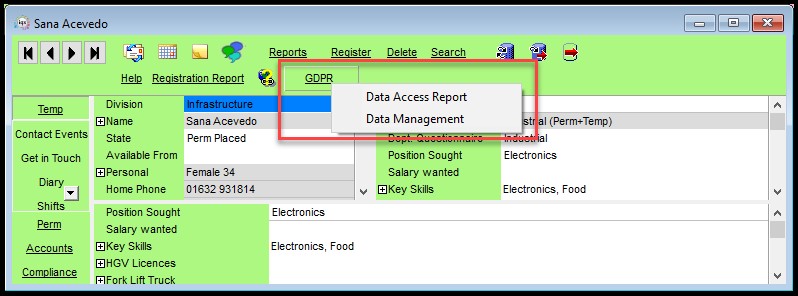
If a candidate requests a copy of the information held in the database about them, it is possible to obtain this information by clicking the GDPR button and selecting
Data Access Report in the Person record.
The information will be displayed in pdf format.
The Data Access Report delivers just one candidate’s information.
All requests for this information are audited.
It is strongly recommended that the Data Access Report and any attached documents are reviewed to prevent disclosure of information that might affect another
person’s right to privacy.
The Data Access Report can be redacted using the same process as redacting Compliance Documents. Areas can be blanked with either white or black to ensure that
data the candidate should NOT see, like personal details of client contacts, is removed.
Where there are documents which cannot for some reason be included in the Data Access Report they will be included in the zipped file containing the Data Access
Report.
Clicking Email button will send the report to the email address held in the candidate record. Therefore, it is important to ensure this email address is correct.
Two emails are sent to the candidate; one will be the report and the second will be the password to gain access to the report pdf.
It is possible to Save the Data Access Report and associated files to a user selected folder. This will allow for other methods of transmission of the report where the
zipped file is too large to be sent as an email.
It is also possible to Print the report and sent it to the candidate by mail.
Contact Events
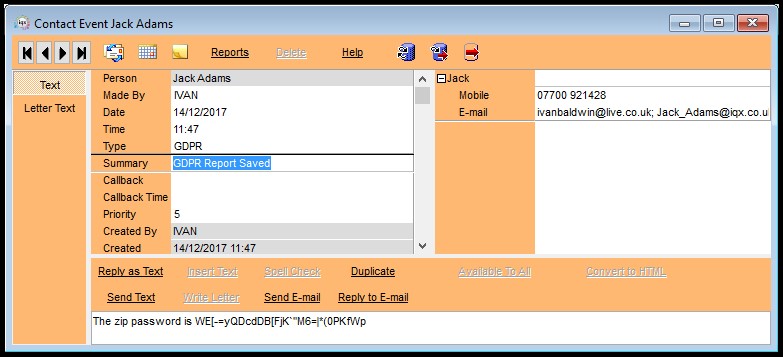
A contact event can be created to record when a Data Access Report is either emailed, saved or printed. These Contact Event will be saved in Person Contact Events.
Where a Data Access Report is save electronically and provided a GDPR Contact event has been set up the pdf password will be saved in a Contact Event.
Data Management
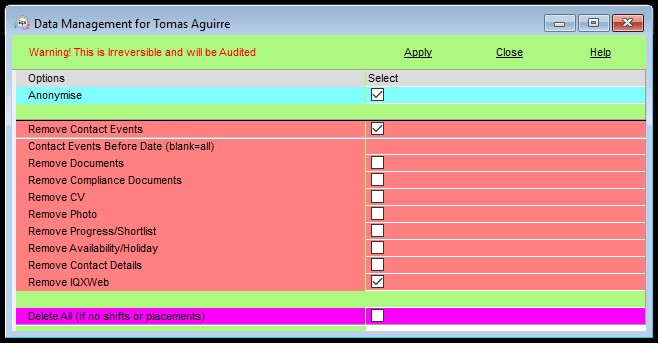
Warning! This is irreversible and will be audited.
After receiving and considering a request from a candidate to be forgotten or for their details to be removed the GDPR - Data Management drop down on the Person
Record and in the Data Access Report view can be used to modify a candidate’s record.
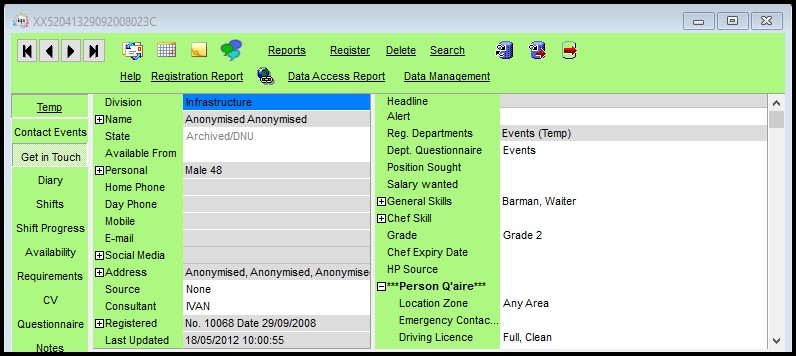
The Anonymise option anonymises all personal data in the selected record. The candidate record title will be changed to the candidate’s personid.
There may be areas where personal details may be stored in text on the person record and placement records. It is recommended that these locations like
Person – Notes are manually reviewed at the same time to ensure the maximum possible anonymising takes place.
The Candidate’s audit trail will also be deleted.
Other Options
- Remove Contact Events – can be refined to only remove those up to a date by using Contact Events Before Date field as well.
- Remove Documents, Compliance Documents, CV, Photo, Progress/Shortlist, Availability/Holiday, Contact Details and IQXWeb logins are all individual options.
- Delete All (if no shifts and placements) - Removes the entire record, unless there are shifts, and placements linked to the Person record.
Obscuring Bank Account Number
This feature requires System Administrator set up.
Complete bank account numbers can be obscured. Users will be able to see the last four digits of the account number for confirmation purposes.
System Administrator
Filtering Selector results
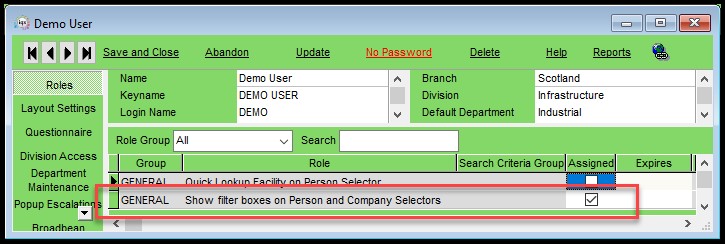
This feature is activated in Maintenance – Users – Roles – Show filter boxes on Person and Company Selectors.
Setting a Default view and extra columns
The setting up of custom columns in IQX have been updated to allow them to be more easily defined. In Database Setup – Custom Grid Columns it is possible to view
and add current custom columns by Department/Form and View. Select the Department, Form and View.
There is a wiki page to assist with specifying sensible data for new columns Here
Existing switchable fields have been migrated automatically to global columns.
Existing columns can be hidden by inserting 0 in the Position column. Specifying a specific position can be problematic as the position of a column is also affected by
hidden columns. Therefore, some trial and error may be necessary to get a column to appear in the desired position.
Tip: Set the position of a custom column by moving it within the relevant view, right clicking on a column header and saving it as a either a Departmental or Named Layout.
Note: If you create a custom column in a department which is not your User default department you will not be able to see those columns.
You would need to change your default department and then reopen the person selector to see them displayed.
If you want all departments to see a custom column it would need to be generated in the Default department.
Default Searches and Easier access to Searches
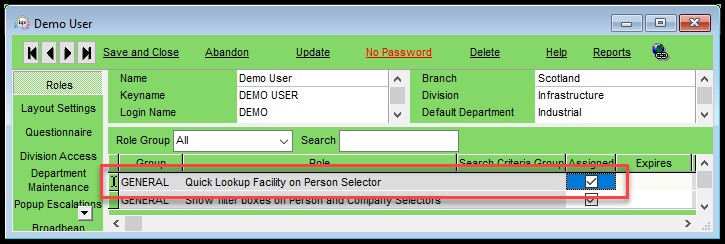
Quick Lookups are maintained by Users who have Departmental or Full Maintenance rights and have the role - Quick Lookup on Person Selector activated.
The end user will also need the Quick Lookup Facility on Person Selector activated.
1 page New Person Wizard
The availability of Fast New is division based and is selected by ticking the relevant box in Maintenance – Agency Setup – Divisions.
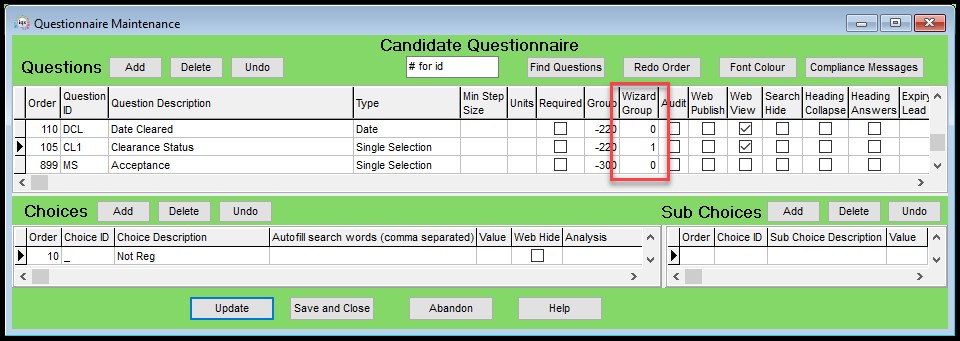
Questions in the departmental and general Candidate questionnaire can be selected to appear in the Fast New wizard by using 1 in the Wizard Group.
The User - Layout Settings - Hide Person New applies to both the Fast New and New button.
Fast New and New Buttons hidden in Person - Modify Screen - Hide Person New Button.
Quick ‘Left Message Call Back’ contact events
To set up this feature the relevant contact events can be identified in Agency Setup - Contact Event Types by ticking the ‘Auto close on Select’.
Hint:- Give this contact event type a low order number so that it appears near the top of the drop down list.
Filtered last contact date
A new Maintenance – Agency Setup screen has been setup to allow the identification of the last actual contact with a Person out of available contact events.
Contact events which meet this standard can be selected by ticking the adjacent Include box in Agency Setup – Person Active Contact Events. Selection is by division.
The selections are recorded in the ContClassPersonDivFilter table on the database.
Once triggered a new column, FilteredLastContactEvent, in the Person table records the date/time of the last contact event type identified as an actual contact.
This information can be searched on and added to reports.
In addition, this information can be searched on once a new searchable data Item is set up in Database Setup - Dictionary of Searchable Data Items.
Once set up it is possible to search on this data.
User Role - Can maintain users
A new user role has been added to give the ability to add new users and maintain existing users without having other maintenance rights.
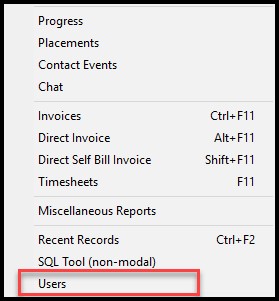
The role is visible in Maintenance – Users – Layout Show User Selector.
This role can be accessed via the Select drop down menu.
Clicking on Users opens the same Users view as Maintenance – Users.
Any changes to a User record are audited.
Note:– A User will be able to access their OWN record and change their own rights.
GDPR
Data Access Request Report
To set up access the Data Access Report and Data Management function the user must have the ‘Can use GDPR functionality’ role set up in Maintenance – User – Roles.
In addition, the user must have ‘Can send CV as PDF and CV packs’ ticked to enable the Data Access report to be generated correctly.
General Settings – Settings 1460 should be blank.
The report GDPR.rtm needs to be in the Reports folder. Please contact IQX for a copy of this report.
A report request is logged in Database Diagnostics- Audit trail.
Data Management
The delete and anonymising features will make recovery of accidentally anonymised/deleted information difficult and in some cases expensive to recover.
Use of this button and any actions in the subsequent view are audited and logged.
To check logging insert the following into SQLTool:
select * from datamanagementlog order by whenentered
Contact Events
The Contact Event type must be created in Agency Setup – Contact Event Types and identified in General Settings – Email/Telephony 128.

Obscuring Bank Account Number
To obscure bank account numbers go to Maintenance – General Settings – Privacy – Star start of Bank Account Number and set the values to ‘Y’.


