This is an old revision of the document!
References
Set up - for Systems Administrators
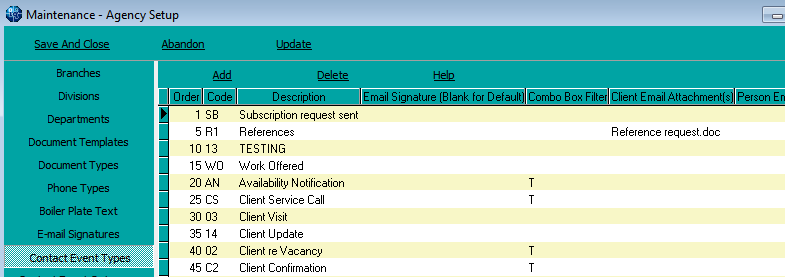
- If you wish to send a standard document out with the reference request, create the document and save it in the reports directory.
- Link the document to the the Contact Event type by entering the full document filename in the client email attachment column (Agency Setup, Contact Event Types, Email Attachments.) Multiple attachments must be separated with a semi colon (;). Each time this contact event type is used to send an email it will attach the document(s).

- Create boiler plate text if you wish to have a standard email text to be used. Using the insert text on the contact event makes sending the request quicker. (Maintenance, Agency Setup, Boiler Plate Text, ADD). See also Boiler Plate Text.
- Finally switch on References for the database. General Settings, Switchable Views, 110 Person Reference Request Y.
USE
You will now see a new screen on the person form called Reference:
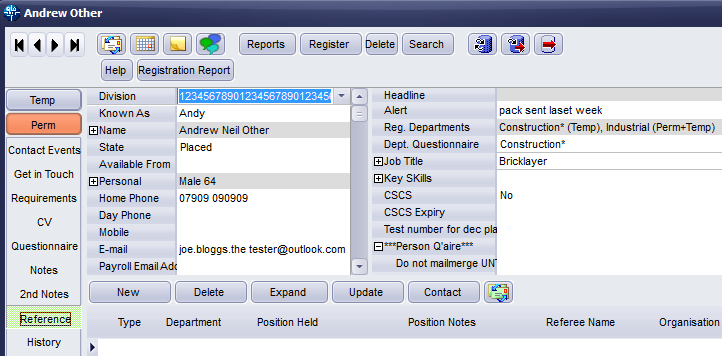
To add a new reference to a temp, use the NEW button.
You will be given the following options.
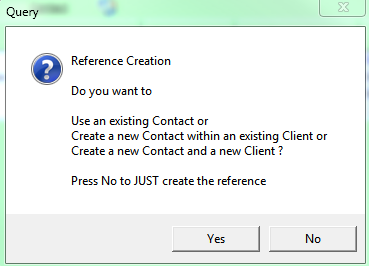
- Clicking yes will allow you to search for contacts already existing in the database so you can attach the reference request to a client. You will be able to then add the contact against an existing client or add a new client if they are not already in the database.
- Clicking no will allow you to add the reference line without linking it to any records (for a reference request from someone who is not a client or potential client for example.)
If you click yes then search for the company and select the contact that is to be the referee.
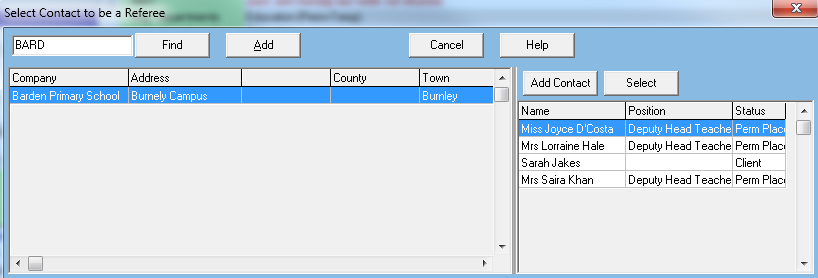
Select the company or add a new company. Then select or add the contact against the company.
This will bring up the reference form.
If you clicked no to create just a reference you will be taken straight to this form.
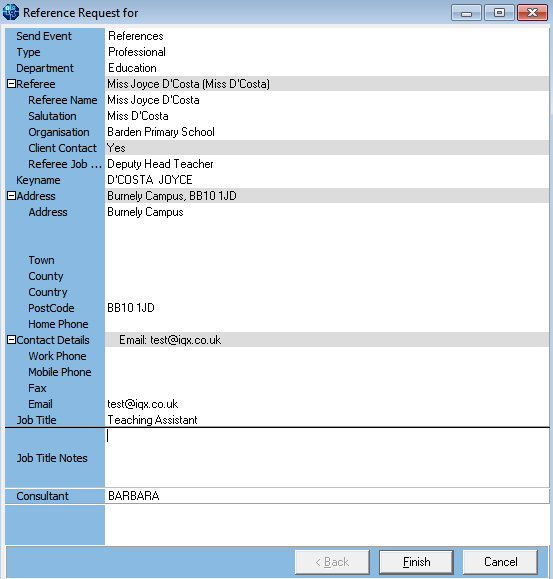
Fill in the required fields and finish. This will open the Contact Event to send the reference; make sure the correct type is selected and then complete your email using insert text if boiler plate text has been set up and send email.
The referee will now appear on the reference screen for that candidate. The date that they were created and when the Contact Event to the referee was created are filled automatically. The process date and consultant fields track the progress stages of the reference.
Once a reference has been returned, from your Desktop Inbox save it to the documents on the relevant records, and save the email as a contact event. See also SAVING AN ATTACHMENT FROM AN EMAIL IN THE INBOX TO THE DOCUMENTS VIEW OF A RECORD.
Enter the date into the Reference Returned column. Once the reference has been checked and completed, enter the completed date on the reference screen.
Further references can be added by repeating the steps. Once a reference request has been sent the record cannot be deleted.
Reference lines that have been created but are awaiting a request to be sent are coloured green.
Lines where the reference has been sent or returned but not checked (completed) are black.
References that are completed are blue.
Search criteria can be added for references.
Each time a stage is completed (ie. a date is entered) the processed date and processed by fields are updated with the date and user details.
Back to Candidates. How to...
