Inbox and Contact Events
Inbox Settings
From the Desk Top the most recent emails of the computer's inbox are displayed in the Inbox view. The amount of emails showing and refresh rate is set per User, as a large amount of emails takes a long time to load.
In the User form, scroll down in the top right settings to see the Inbox settings.
The Inbox refresh rate will auto update the Desk Top if this is set, so it does not have to be done manually.
To aide with quickly finding the relevant email you are looking for from version 2.21.08 onwards there is a filter on the inbox. Note this will only filter on emails that are visible in the list, it will not search your whole inbox. In addition to this the columns in the inbox are all sortable so you can click on a column header to order it.
from 2.22.9+ the name of the email provider is displayed in the Inbox.

2.22.02+ brought some new features to the inbox:
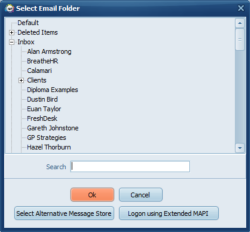
Change Folder - When accessing the Inbox via the Desk Top there is a new button ‘Change Folder’. When pressed this will allow the user to select an inbox sub folder to view in the inbox. This folder will be the default for the next time the user goes to the Inbox.
Note: This is NOT available for Users set up for new Exchange Web Services.
Search - When accessing the Inbox via the Desk Top there is a new button ‘Search’. Users can type into the box and then hit the search button to return emails related to the search. Please note this does not search on all folders, only the specified folder and the search is not live searching when you enter each letter, it only starts when the button is pressed.
Fetch Limit & Fetched - Fetch Limit and Fetched have been added to the Inbox. This allows users to vary the number of emails that will be ‘fetched’ from the selected folder (inbox or other selected folder). The Fetched then displays how many emails are being displayed. In the below example the number of emails in the selected folder is lower than the fetch limit, hence the difference in the numbers.
Please note that the maximum you can set the fetch limit to is 200 and it is worth noting that the higher this number is the more time it will take for the emails to load as each one is checked to match IQX records. This overrides the user setting.

Linking incoming emails to IQX records
If an email address is matched in IQX then the email can be saved directly to the main record using Save Message as a Contact Event.
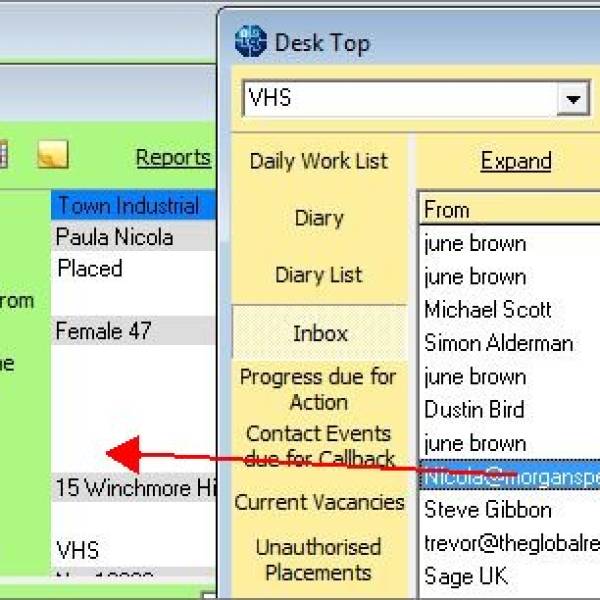
If the email is not matched to any records in IQX, using Drag and Drop will save the email to the record.
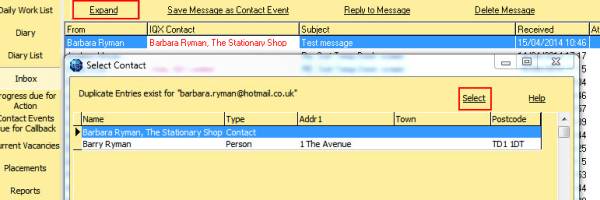
From version 2.2.10.5 - If the email address is matched to multiple records within IQX, the IQX Contact field on the inbox view will be highlighted red. On expanding the email you will be prompted to select the correct record before saving as a contact event or replying.
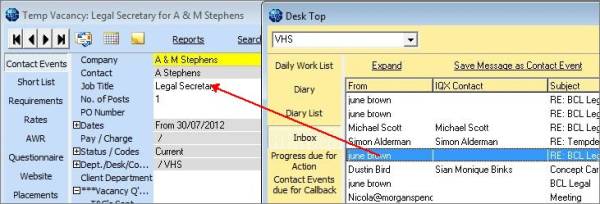
To attach an email as a Contact Event to a Vacancy: If the Vacancy will be found in Current Vacancies then go there, Expand, move the Desk top to the right and drag from Inbox onto the Vacancy Position. The cursor will show as an arrow with a box. Drop and a contact event will be created.
Attaching an email to a record without an email address
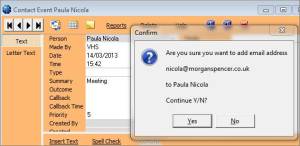
Expand the record, move the Desk top to the right and drag from the inbox onto the record. For Person and Contact records you will be asked if you want to add the email address to the record.
A contact event is created and you are given the option to save the email address against the record or not.
Yes will add the email address.
No will NOT add the email address.
Saving an attachment from an email in the inbox to the documents view of a record
If an email has attachments they do NOT get saved with the contact event, but they CAN be saved in a Document view – such as Vacancy Documents, Client Documents – providing that Document TYPES have been set up.
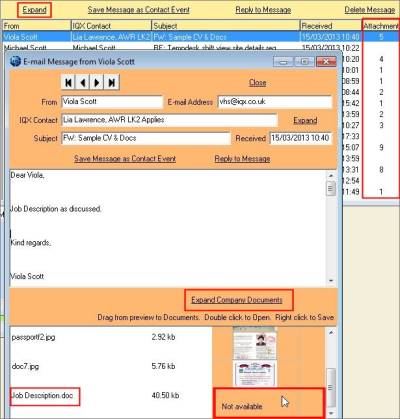
The inbox shows how many attachments there are to an email - but the count does include images that are part of the signature as well as deliberately attached items.
When you expand the email the attachments are visible at the bottom.
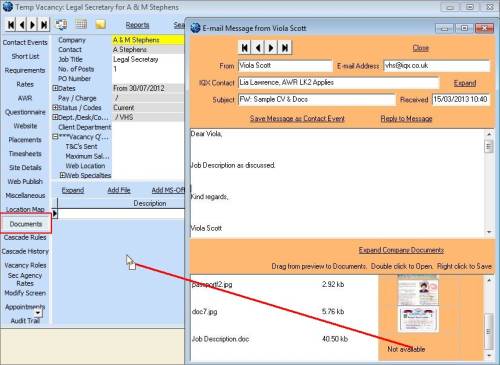
There is a button to expand the Person or Contact Documents view but it is possible to drag to other record Documents view.
You can also Double click on the coloured preview section to open. Right Click to save in a folder.
To drag – open the record to receive the documents and go to the Document view
You will be asked to select a type, then the document is added as a File to the documents. It will not be directly editable.
Please take a look at our Email and Contact Event video: https://vimeo.com/351642860
Back to Hints, Tips and Shortcuts


