Timesheet Image linking and completion
Timesheet images can be linked to an IQX timesheet so that the image can be added to the invoice PDF for printing or sending by email.
- Timesheet images - arriving by fax or email.
- If the timesheet image is for all the shifts in the week for that Temp and site - save to the N:/IQXTIMESHEETS folder (or whatever folder has been designated in the General Settings as being the timesheets folder) with the name as front of file name e.g. 9288913y598u092509.pdf should be saved as something like:
- JoeBloggs9288913y598u092509.pdf or
- Bloggs9288913y598u092509.pdf or
- Bloggs ward x week52.pdf for example, choose a format that suits.
- If the timesheet image is for just one of several shifts in the week for that site, or contains images for other sites too - save to the N:/IQXTIMESHEETS Merge or Split folder, again with at least the name in front of the filename so they can be merged or split as required.
- Timesheet images arriving in paper form. Scan and save to the N:/IQXTIMESHEETS folder.
Merge or Split the images in N:/IQXTIMESHEETS merge or split using the PDFill PDF Tools, saving the results in N:/IQXTIMESHEETS and deleting the originals so that the merge or split folder is empty.
For Anywhere users timesheet images should be saved to a folder then zipped up, these can then be uploaded into the database.
Using the images to complete timesheets in IQX
- Open the Temp Desk form,
- Select the first temp desk,
- Check the week is correct,
- Select the Timesheets view and use the CREATE button to create blue provisional timesheets from the booked shifts.
-
- Select the Temp Desk
- Select the Year and Week
- You can include previous weeks to catch late Timesheets by using Prev Weeks.
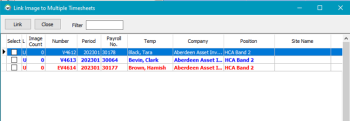
Look at the image on the left and find the Timesheet from the list on the right to match.
- Use the Link & Open button. This will Open the Timesheet for completion. Drag to right so that you can see the Image to read the Shift details. The Image will now be shown on the Linked view instead of the unlinked. You can move the central margin to widen the image.
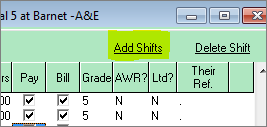
- Check the shift start and end times and the break againt the timesheet and edit the shift if required.
- Enter the client shift reference in Their Ref (if there is none required a full stop will do).
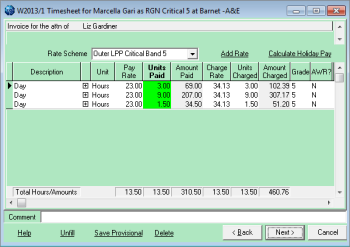 The Rate scheme script will look at the day and time of each shift and split the shift into different paybands accordingly. The break will be taken from the longest stretch of time. Visually CHECK the rate scheme looks correct for the temp and position and ward as the invoice will be taken from these lines. Accuracy is key at this stage.
-
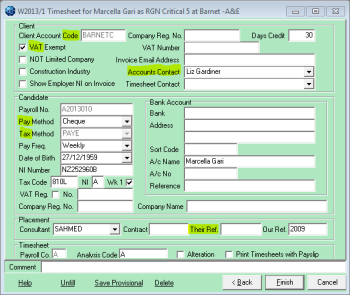
- Basic client account settings, of which you should always check the code, VAT setting and Accounts Contact.
- Candidate payroll settings, check pay method and tax method.
- Position reference - not the same as shift reference, but can be used to group timesheets on invoices.
A comment can be added at the bottom for unusual or correction timesheets.
Finish will complete the timesheet and move the image to the folder for the Year, Division and week. If the blue line does not disappear or turn black (depending on the Linked tick) use the Refresh button to get tht correct status. Note that depending on your general settings completed and linked timesheets from previous weeks will only show in the week it is from even if previous weeks has been set.
Work through the images and Temp Desks, doing the easy links first, then you will be left with the blue timesheets that are still awaiting images, and with images that are awaiting blue timesheets.
An image can relate to an earlier week - change the week and Tempdesk to find it.
If there is no blue timesheet corresponding to the image in that week, go to the Temp Desk, Timesheet view. Clicking create again will look at shifts that have not got a timesheet and create a blue provisional.
Alternatively, go to the Temp record and look at the shifts view to see if it was entered. If it was, then in the Timesheets view you can create a Timesheet individually, selecting the right week and desk, and use Save Provisional button. Now, it will appear on the Image linking view (you may need to use the refresh button)
Or go to the Vacancy view where you can do the same.
Or check with the Consultant and ask them to add the shift.
If an image is not needed then when the Timesheet is selected on the right, use the No Link button on the left to mark the Timesheet as not needing a link, and it will be linked to a blank.
If an image relates to more than one timesheet in IQX once the image has been linked to the first timesheet click on the Linked tab and select the Link Copy to Other TS button, a list of all other provisional timesheets for vacancies with that client will be displayed and the user can select which other timesheets should also be linked to this image. The image will be added as an extra image for all additional timesheets so it can be referred to in the future should there be any queries but only one image will be attached to the invoice if the invoice covers all of the timesheets.

If an image is still needed you know who to chase. This is best done from the Timesheet view. Select the lines to be chased by holdingdown Ctrl and clicking the line - it will be highlighted blue. When you have highlighted all relevant lines, use the Process button, Temps, to open the person selector with those Temps. On the Mail Merge view you can start a mail merge or use the Send Text button to contact the temps about the missing timesheet images. Alternatively you can hold down Ctrl and click on the relevant lines and use the notifications button to contact the temps.
Trouble Shooting
- There is a shift on the timesheet image but not on IQXtimesheet. This may have been a self booked shift, or not added by the consultant. Company Policy is to be decided and followed here.
The options are: - There is a shift
 on the IQX Timesheet but not on the image. This may have been that the shift was not worked, or there is another timesheet image. Company Policy is to be decided and followed here. If the shift should have been cancelled you can still continue the timesheet by unticking the pay and bill columns for that shift and then the shift can be cancelled later.
- The rates on the second view are 0.00. This means there is a mismatch between the grade of the shift and the grade of the rate scheme.
If this is a new vacancy, it maybe that the wrong scheme has been selected. Check with the consultant to correct it.
Otherwise the wrong shift has been originally entered. It is possible to change the grade of the shift in the first view to what should have been selected.
Accessing Client Email addresses in Timesheet Image Link
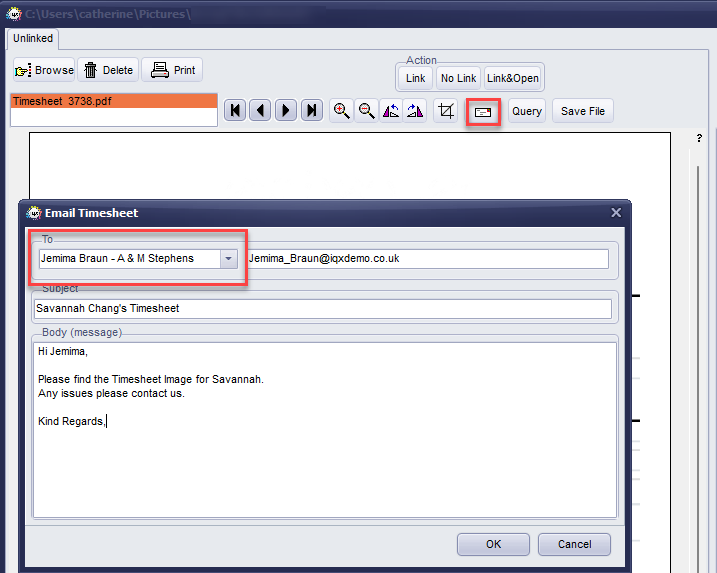
When emailing a Timesheet Image, Client Email addresses can be searched or typed into the email box.
To access this feature – Accounts – Timesheet Image Link – Letter Icon – enter or search company email addresses in the To box.
Go back to Quick Guides and How to


