Person Record - Placements
Refers to:
Person form → placements tab
The placements tab shows all the placements, either permanent, contract or shift, that are linked to the Candidate.
The Process button will open the Placement Selector form prefilled with these placements, for reporting or analyzing.
Note: The Placements tab appears in the Temp, Perm and Accounts sections
Vacancy Record - Placements
refers to:
vacancies form → placements
This table shows the candidates who have been placed in the vacancy. Normally you make a placement from the Short List but you can add it directly from here.
The Placement holds all the details required for invoicing a Perm placement or generating timesheets for a Temp. It is important to get the details correct.
To place a candidate from the vacancy placement screen (no short list):
- Click on the Placements option on the left hand side of the screen.
- Click on the Add button. In the selector enter the keyname of the candidate you are entering.
- Select the candidate, and click Ok.
- Enter/confirm the start date and Leave date (if known) and click on OK.
- If the placement completes the number of posts to be filled you will be asked if you want to change the vacancy state to Filled and change the progress state of all unsuccessful candidates in the short list to Rejected. If you say Yes then the status will have to be manually changed when the placement comes to an end.
- Now complete the details of the Placement form.
Extending a Placement
When an existing placement requires to be extended rather than create a whole new placement users can use the Placement Extension System (from version 2.21.4 onwards).
Users with the layout role to enable them to authorise Placement Extensions will see this new button on Placements.

When this is pressed you are then prompted to select the reason for the extension, the new leave date and the reporting start date, you can also add any relevant notes at this point.

All of the changes made are detailed in a placement extension table which can be viewed at the bottom of the Placement. This shows the original Start Date, original Leave Date, the updated Leave Date as well as who changed it and when. This table is also updated if you manually change the Leave Date or create a Provisional Timesheet that is beyond the current Leave Date.

This feature requires system administrator setup.
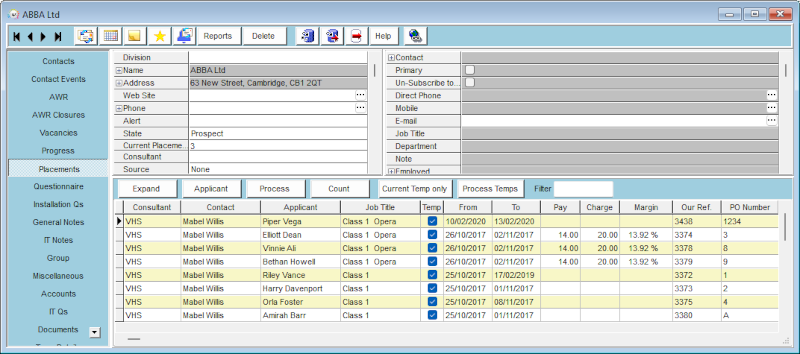
Company - Placements View
From this tab you can view all Placements directly linked to this Client.
You are able to expand Placements and view the Candidate from here as well as process Candidates and Placements.
Go back to Placement Records...