This is an old revision of the document!
Temps Setup
Payroll Years
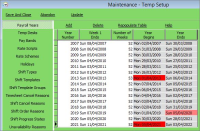
For Temp Year and Week numbers to appear in the Temp Desk they must be set up. There are restrictions according to what back office is connected. The Years are numbered by the year at the start of the financial year. e.g. 6/4/2004 to 5/4/2005 is called 2004. This can be changed if another method is preferred. If a candidate works in week A they will actually be paid in the next week in week B. The decision has to be made whether to link the IQX week number with the payroll week number. If yes, then in IQX call the last week of the financial year (including 5th April) Week 1 and it will correspond with the payroll week 1. If the Week 1 ends on a Sunday the days will be presented in the Temp Desks as Monday to Sunday. To present the days in a different order make the Week 1 end on what is your last day of a week. (Not available with LSM Back Office)

Temp Desks
The Temp Desk system is a way to arrange work for the convenience of individual consultants. They can get at active Temp Vacancies for filling, processing and completing time sheets, in the time frame of a week or a month.
There are two ways of organising Temp vacancies; by contracts or by shifts.
Contracts: here the skills are of primary importance and the time frame is likely to be continuous. The vacancy is displayed as needing work until all positions are filled. Placements are made for each candidate filling a position. Timesheets are generated from the placement.
Shifts: Where time matching is of primary importance and there can be varying times for each day. The vacancy is displayed with the shifts entered for each day, either unfilled or with the candidate linked. Timesheets are generated from the shifts, with placements retrospectively created from the timesheets.
You can create as many Temp Desks as you require to fulfil your business requirements
- Each Temp Desk is attached to a Department for skills matching.
- Each Temp Desk is attached to a Division for viewing access.
- Each Temp Vacancy is attached to a Temp Desk
Applicants can be attached to several Temp Desks to make groups of skills easy to search. Consultants can work with any Temp Desk but should have a primary attachment to one. Temp Desks can be seen in Monthly or Weekly views. For example, if you have 4 consultants all working in one department you could have:
- One Temp Desk that all consultants work in together, any consultant working on any job.
- A Temp Desk for each consultant, where they bring in their own vacancies and match their own candidates
- A combination of the above, depending on agency working methods.
For initial configuration consider how your consultants work – individually or in teams – and list the potential Temp Desks that will be needed. The IQX installer will also be able to advise.
To create a Temp Desk
For each Temp Desk you need to add the following:
- Name - Enter an appropriate name for the grouping.
- Default View - Select the view from:
- Monthly Contract which displays by vacancy a month at a time,
- Weekly Contract which displays by vacancy a week at a time,
- Weekly Shift which displays by shift states a week at a time.
- Department - Selects the department.
- Division - Selects the division.
- Current Year - Enter the code for the current Temp Year. This should correspond with a year in the Temp Years table.
- Current Week/Month - Enter the year and month number. This will set the first ‘Current Date’ setting.
- Default Payroll Company - Enter as appropriate for your back office. For LSM Back Office enter A.
- Default Analysis Code - Available if required for extra report functionality.
- Timesheet Period - Weekly or monthly.
- Default check timesheets - Alters the behaviour of the Vacancies tab: colours reflect whether placements or timesheets are completed for the vacancy.
- Extra Codes - Available if required for extra report functionality.
Temp Pay Bands
The parameters for each type of pay unit must be set. They are used in specially defined Rate Schemes for Departments or Clients but can be set to appear by default on the Vacancy Rate Tab. To add a Temp Pay Band:
- Description - Will be carried through to payslips and invoices
- Unit- Hour, Day or Week (as in Holiday Pay)
- Payroll Flag - Varies according to back office system. The installer will advise.
- Appears by default - If ticked, will appear empty for each vacancy
- Holiday Pay - Is treated as Holiday Pay and decreases the entitlement
- Include in Holiday Pay - Counts towards the rate of pay in Holiday Pay Calculation entitlement ALL PAY USING A PAY BAND WHICH IS TICKED TO BE INCLUDED IN HOLIDAY PAY CALCULATION ENTITLEMENT WILL ACCRUE HOLIDAY TAKE CARE WHEN SELECTING WHICH PAYBAND IS USED
- Sort Order - Controls the display of lines
- LSM Exclude from Total - The units associated with this pay band are NOT added to total units in LSM, as in where a second line for extra payments per hour is used.
Temp Rate Schemes
Default Rate schemes for the Agency and Clients are set up in Maintenance but can later be edited as required for each Vacancy. In the Vacancy the scheme will be selected from the Description.
- To limit a scheme to be visible only for a Department select the Department from the drop down box.
- To limit a scheme to be visible only for Clients with the same Charge Code (entered in the Company-Miscellaneous Tab in the Temp Charge Code field) enter that Charge Code here.
- To get a best guess calculation for Employer NI contributions and for Holiday allowances enter a percent e.g.10% and 8%. This is to help estimate the cost of a Temp for setting Charge Rates. It can only be an estimate.
- Enter the Pay Rates and Charge Rates in the Pay Bands appropriate for the scheme. Extra Bands can always be added.
Shift Templates
Shift Templates need to be defined before shifts can be used. The minimum required is a Description, Times or Duration and whether moveable. Shift Templates can be predefined for a department, client or be global. They can have skills requirements set and time frames, a reference and confirmations required.
- Description - Viewed in the list
- Client Shift Code - Enter if to be used for one client/set of clients only
- Department - Enter to restrict to use by that department
- Skill Section- This does not have to be used! However, if you know there is one Essential Skill that MUST be met you can set it here so that it is never forgotten.
- Skill Questionnaire - Select General or Department from the drop down box
- Skill Question ID - Enter the ID of the skill
- Skill Choice - Can have a Choice ID, % which will match if any choice exists, or leave blank so that a list of the choices is given each time.
- Skill Grade Question ID - This can be used in addition to the Skill Question if your criteria is set up to have grading in a different question. If the initial Skill question is a graded question, leave it blank.
- Skill Grade ID - Can refer to either question and be set to an ID, % or blank.
- Time From and To - Enter the start time and finish of the shift, if the times are regular
- Minutes Required - Is for where times are not regular and you might start at variable times, but be for a standard duration. Then leave Time From and To empty
- Break - For the Timesheet to deduct break time enter the minutes to be deducted here.
- Moveable - Tick to allow manual adjustment of the times in a vacancy
- Reference Req. - Select from the choice of On First Entry, Not Required, On Timesheet Entry or On Confirmation
- Must Confirm - If the shift is to be provisional until the client and/or candidate has given confirmation, tick the box. The shifts will be framed in blue until fully confirmed.
- Shift Type - Is for use with Rate Scripts
- Analysis Code - Is for use with exceptional reporting requirements
Guidance from LSM Logic is required if complex shift timesheeting is to be used.
Shift Cancel Reasons
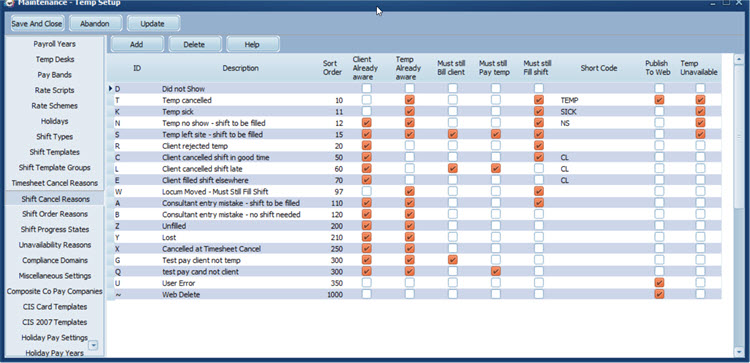
Cancellation Reasons control who is to be notified of a cancellation, if rebooking is required and if a cancelled shift should be invoiced.

Miscellaneous Settings
- Set default numberings for Payroll Numbers and Timesheets.
- Set default shift times –used by availability and shifts
- Set PAYE defaults – Tax Code, NI Letter and Week 1
- Set Payroll and behaviour
- Set how Holiday Pay dates behave.
Composite Pay Companies
Set up the Composite Payroll Companies that can be used by the Agency. Each element can be set to be included or excluded – as indicated by red or green. Once a Name has been entered and Update pressed, each element defaults to Do Not Include.
- To enter an element first select Include from the drop down box in the white line, then enter the data in the now green line. Complete as required.
Any changes to an existing Template will be sent through to all candidates with that Template selected.
CIS Card Templates
Set up the CIS Card Templates that can be used by the Agency
Secondary Agencies
Departmentalise shift order reasons
(2.16.6+)
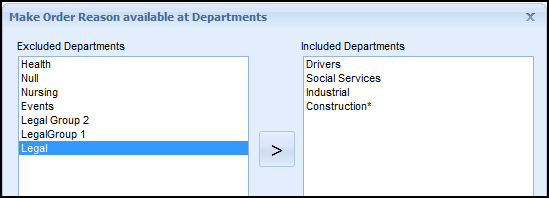
Shift order reasons can be targeted at a departmental level.
Allocating shift order reasons to a Department is done through Maintenance - Temp Setup - Shift Order Reasons.
Select an order reason and click Department. It is possible to allocate that order reason to any or all Departments.


