External Credentials
Used to store credentials for integrations with external systems. Different data items will need to be completed depending on the nature of the external system. These credentials are available to be used by built-in commands like <SendEmail> or directly in Jobs.
More sensitive items are stored in the database using AES256 encryption. Once saved, only the last four characters are shown, preceded by ****. The number of asterisks is unrelated to the length of the underlying data.
When you click on New, you will be asked for the Name, the Type and a Description of the credential record you want to create. The type and description can be edited later, but the name cannot be changed subsequently, and will be used to identify these credentials elsewhere in IQX. Once you have supplied these values and clicked OK, a new form will open where the details can be entered.
SMTP
As a minimum, a name, description and a host address are required. If specified, the Email Address will be used as the SMTP Sender email, otherwise it must be specified in the <SendEmail> command. If no port is specified, 25 is assumed. User Name and Password must be specified if authentication is required. TLS can be ticked if required.
If your email provider enforces two-factor authentication, or you find that you have issues with the valid credentials being rejected, you may need to set up and use an “App” password rather than using a standard password. These passwords are created for a single purpose and are used in conjunction with the normal user name. For more information see GMail or Microsoft / Exchange / Azure / Outlook 365 Be aware that changing the “main” password on the email account can result in any “App” passwords for that account being silently invalidated, and requiring regeneration.
Microsoft Graph API
Registering IQX as an application in Azure
To use the Microsoft Graph API with IQX, you must first set up IQX as an Application in your Azure Active Directory using the Create Azure Active Directory application. To do this, log into your Microsoft Azure Portal as an admin user. Then select Azure Active Directory followed by App registrations.
Next complete the Name field as, for example, IQX, set Supported account types to Accounts in this organizational directory only and set Redirect URI to Web with http://localhost as the URI.
Granting permissions to IQX
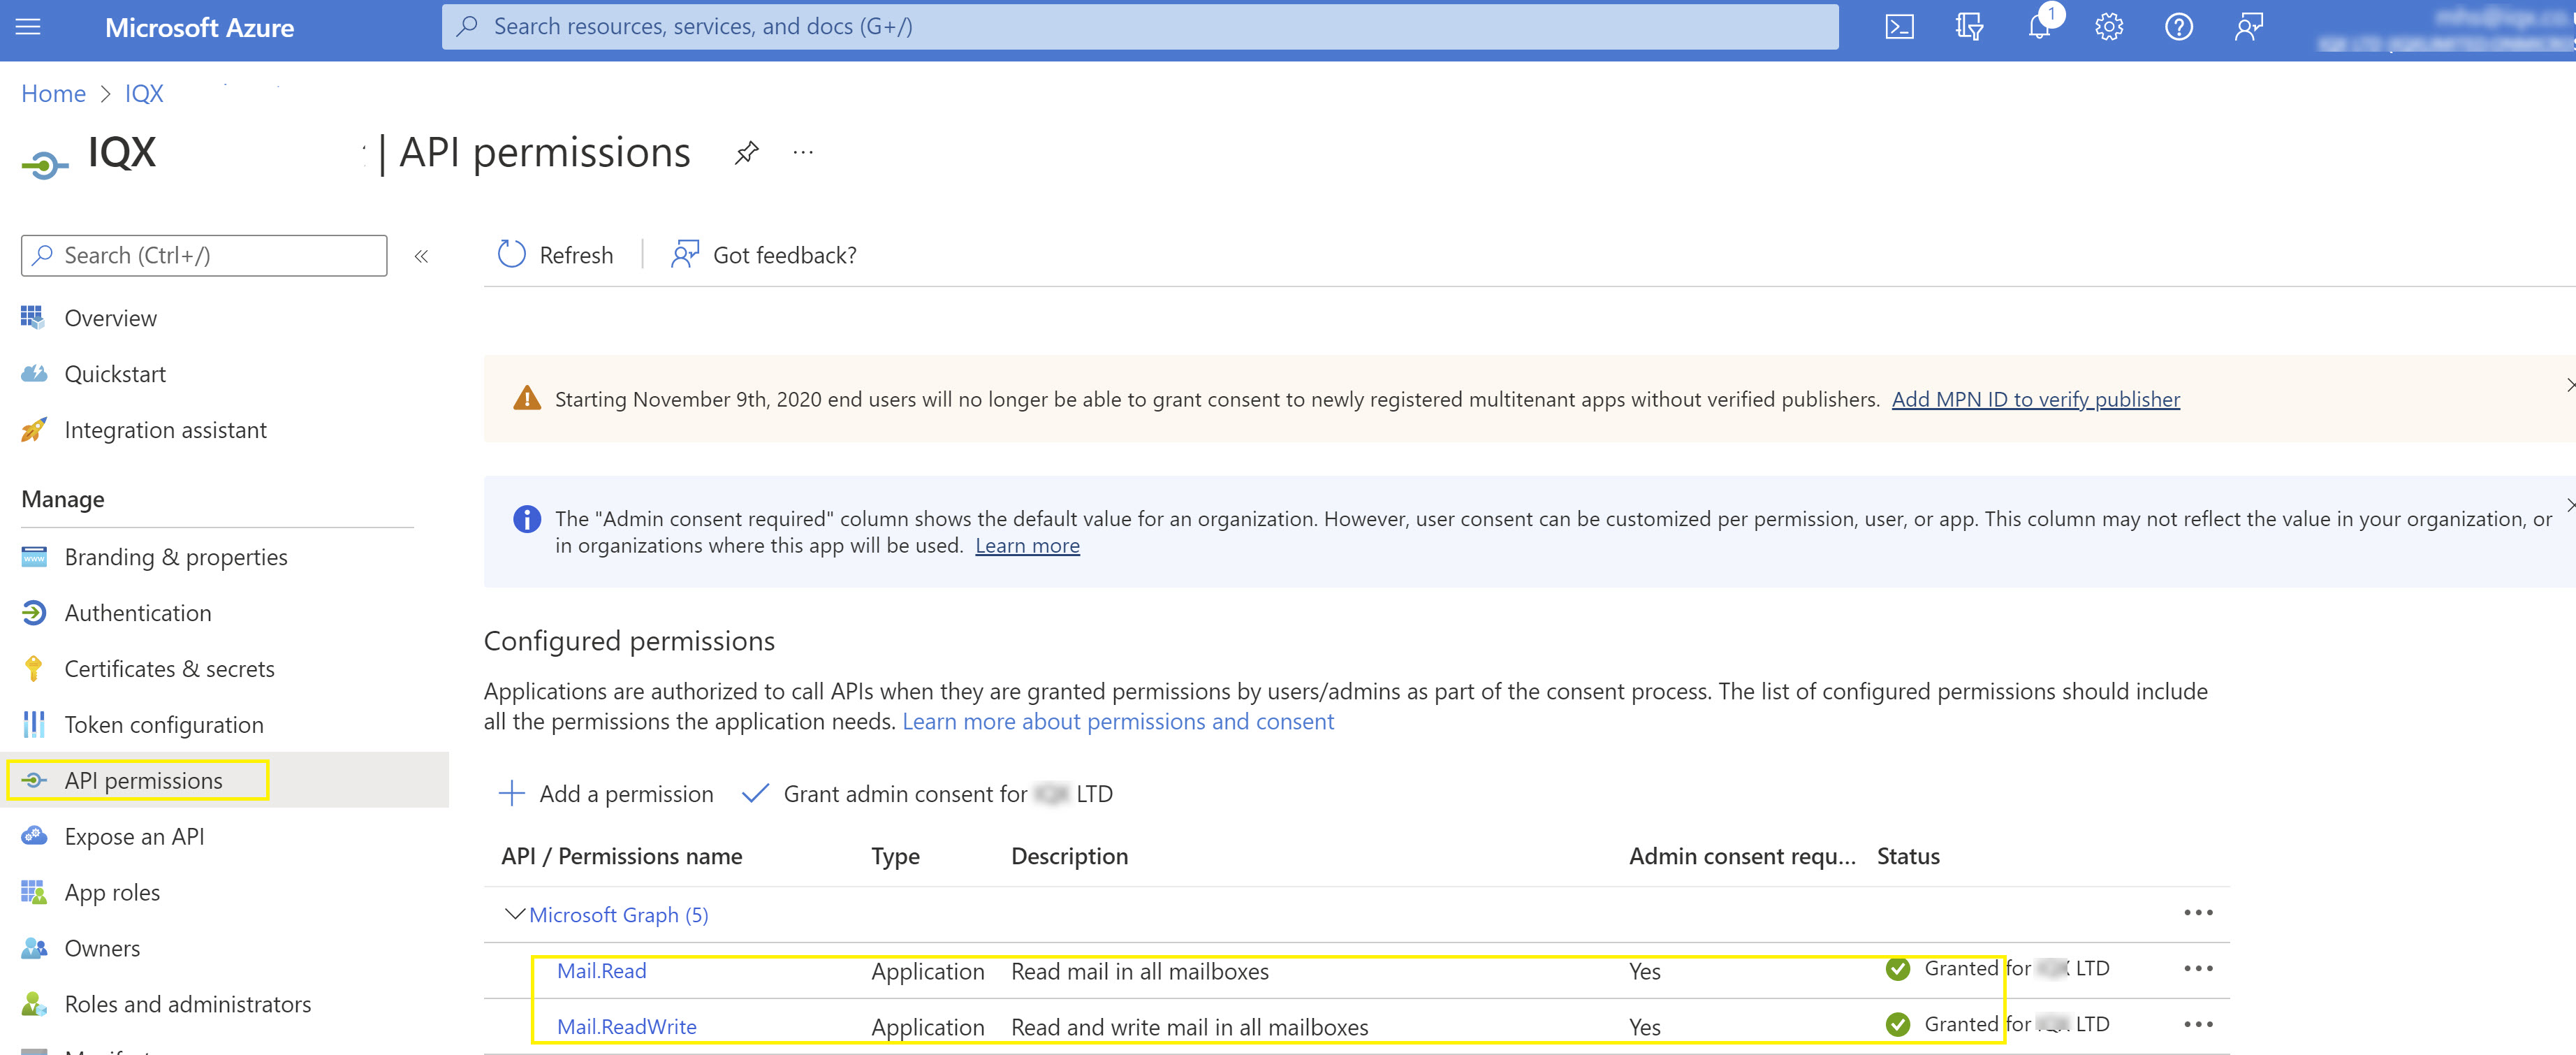
Now go back to App registrations and select All apps. Select the App record you have just created and then select API Permissions. Select + Add a permission and in Request API permissions select Microsoft Graph. Then configure Application permissions and grant Mail.Read and Mail.ReadWrite permission to the App. Finally ensure you choose Grant admin consent for <your company name>. Your settings should look something like this:
Setting up authentication for IQX
Choose Certificates and secrets from the right hand menu. Choose Add a client secret, give it a description and choose Never under Expires. Select Add and copy the displayed Secret into the Client Secret field in IQX and then click on Save & Refresh.
Then back in Azure, choose Authentication from the right hand menu. The screen should look something like this:
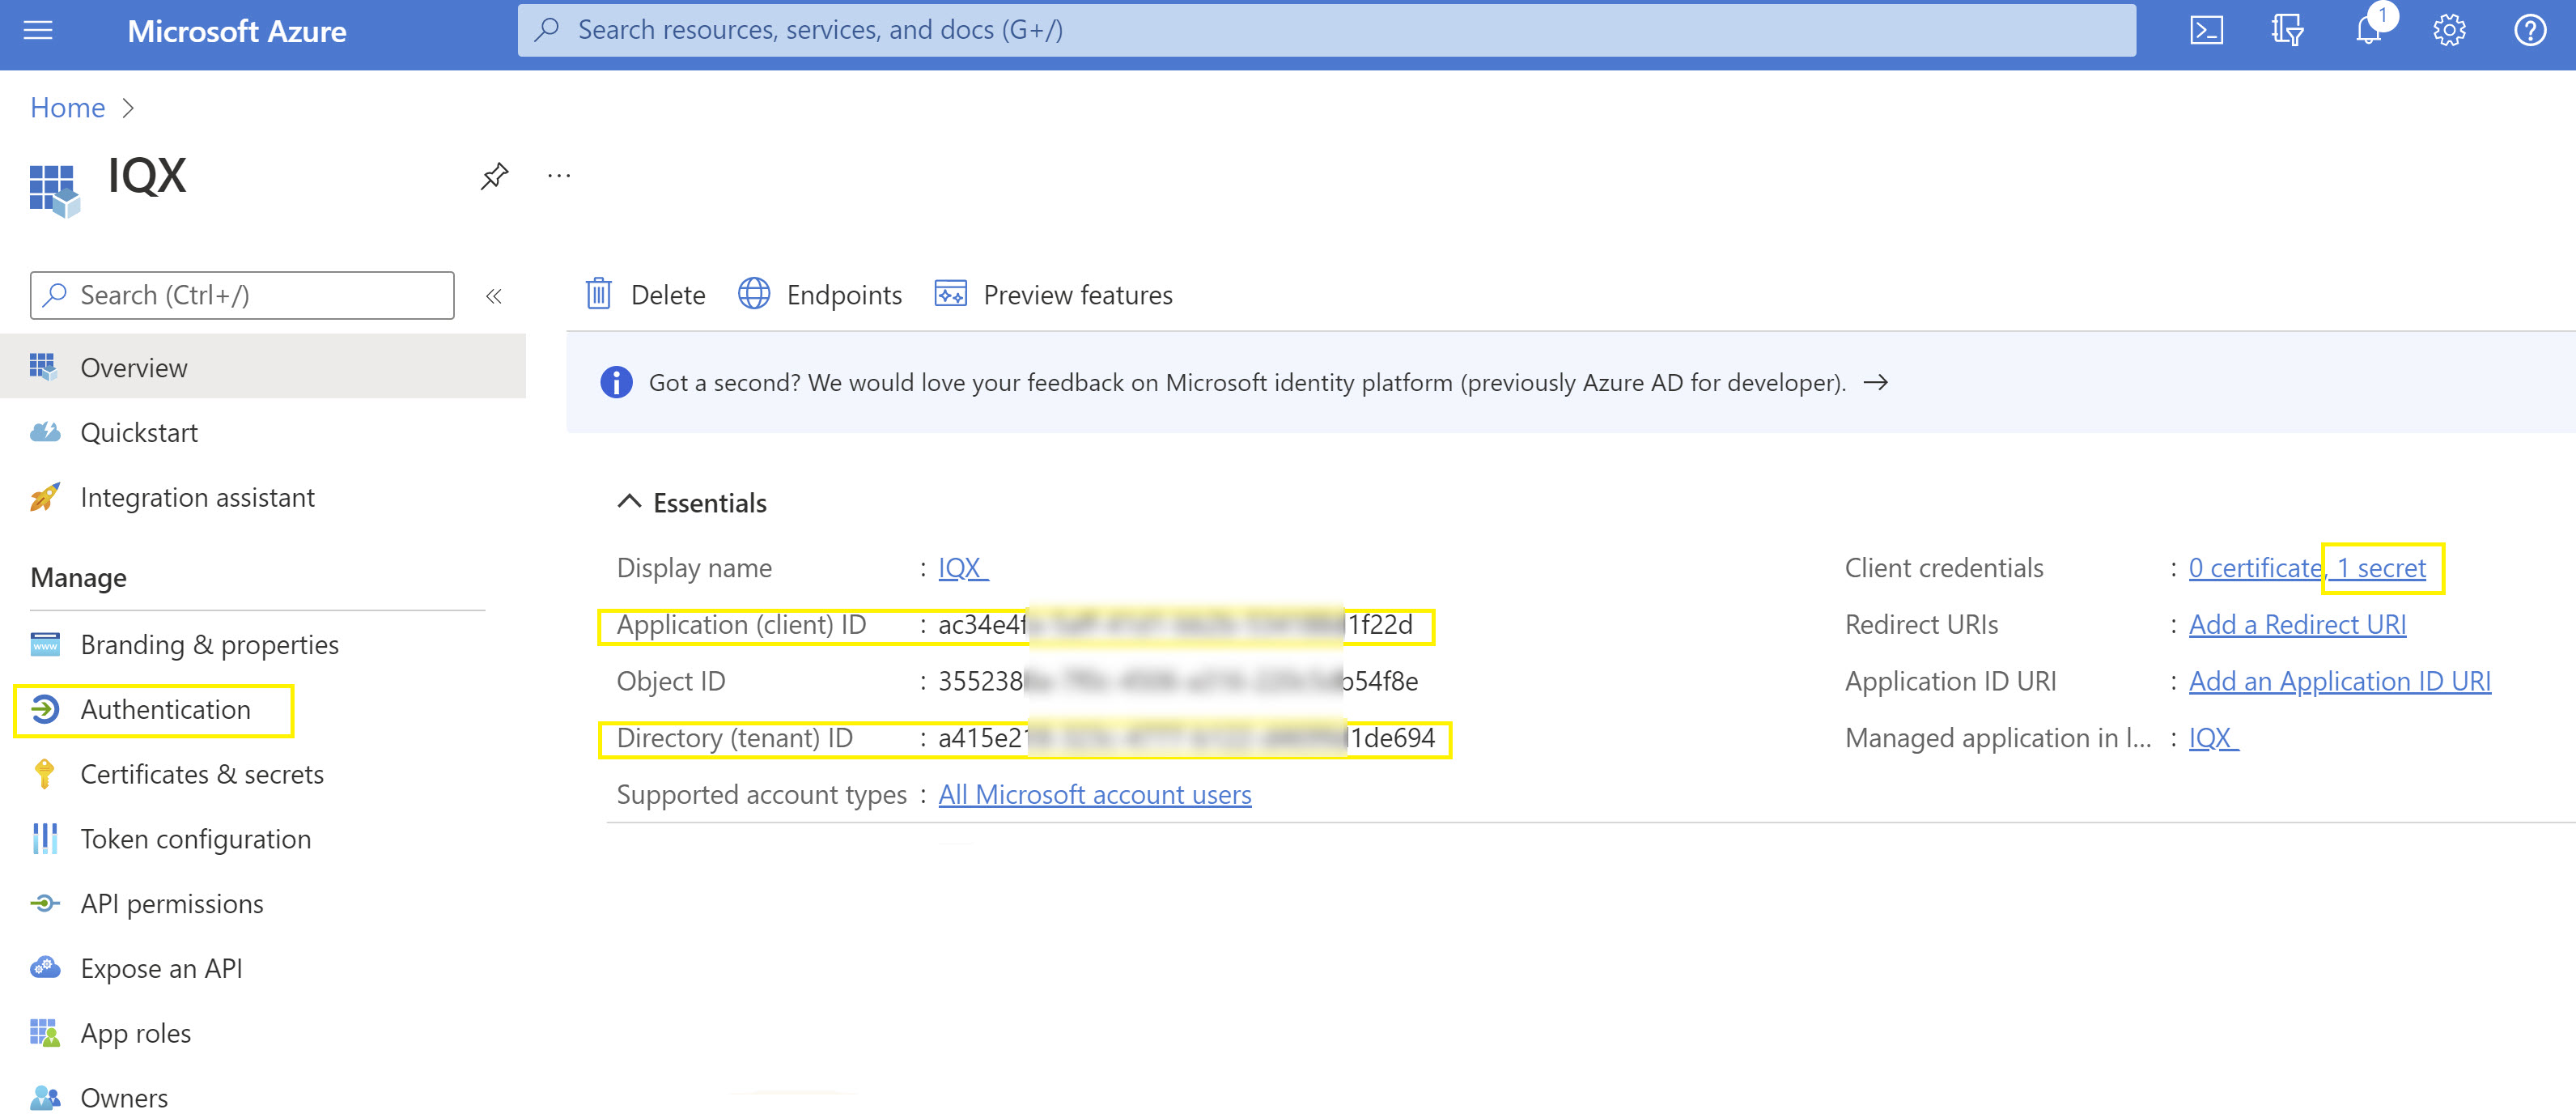
Now select and copy the Application (client) ID into Client ID in IQX, and Directory (tenant) ID into Tenant ID in IQX. Then click on Save & Refresh