Bulk Importing CVs
This is only available if it is enabled – optional per agency
Bulk CV import enables the user to import multiple CVs at the same time and register the candidates against a selected division and department.
Bulk CV Import needs to be set up in the user record, please speak to your System Administrator to set this up.
The first thing the user needs to do is save the incoming CVs into the CVs folder(s) either individually or in a zip file. As you can allocate the Department and Consultant ensure you have separate folders for each and the CVs are allocated to the relevant folder.
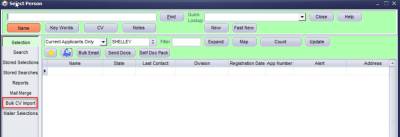
Open the person selector screen and select Bulk CV Import to open the wizard.


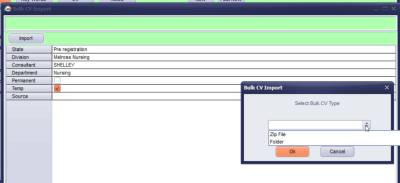
Set the initial configuration on the Import Form by checking the relevant State, Division, Consultant and Department. Select whether the candidates should be regsitered as temp or perm when they are imported and select the source if it is the same for all CVs.
The wizard will default to the user and their default settings but this can be amended.
Click import and select the import type. Note if you are an IQXanywhere user you can only import CVs from a zip file.

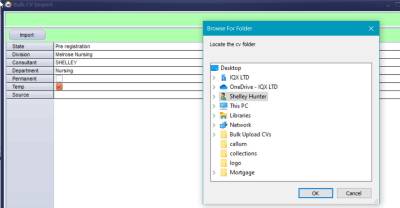
Then browse to the location where the CVs have been saved.
If the selected location doesn’t contain any files an error message will appear.
OK will start the import process and the name of each CV will be shown as they are imported.
Word and PDF documents will be picked up – anything else stored in the folder that isn’t either of these formats will remain in the folder.
If you selected to upload from a folder Successfully imported CVs will then be moved to a sub-folder called Finished and CVs that could not be imported, because of format problems, will be moved to a folder called Rejected. These CVs will need to be added to IQX manually.
If you selected to upload from a zip file you will be prompted to save an excel file that will detail which CVs were successfully uploaded and which were rejected and need to be added manually.
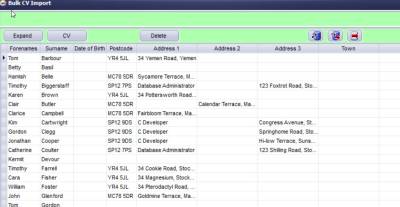
Once all of the CVs have been imported and parsed the following screen will appear:
Individual cells can be edited and the record updated – if you see data that is obviously wrong it can be immediately corrected. Changes that are made on this screen once updated will be updated on the candidate record.
From this screen:
Expand – will open the person record that has been created on the Contact Events View.
CV – will open the person record on the CV tab. You can change the fields if they haven’t been pulled through correctly when the CV was parsed. This is done by highlighting the word, right-clicking and selecting the relevant field. It is not possible to remove information this way – you need to delete it from the record.
Delete – will delete the new record for the selected line.

