Release 2.17.10
User
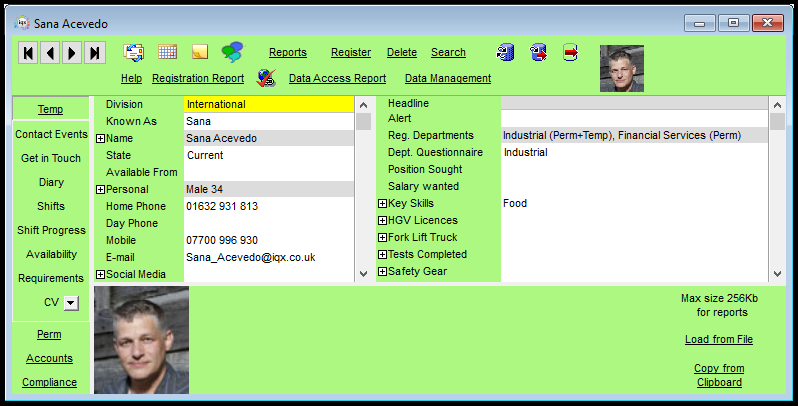
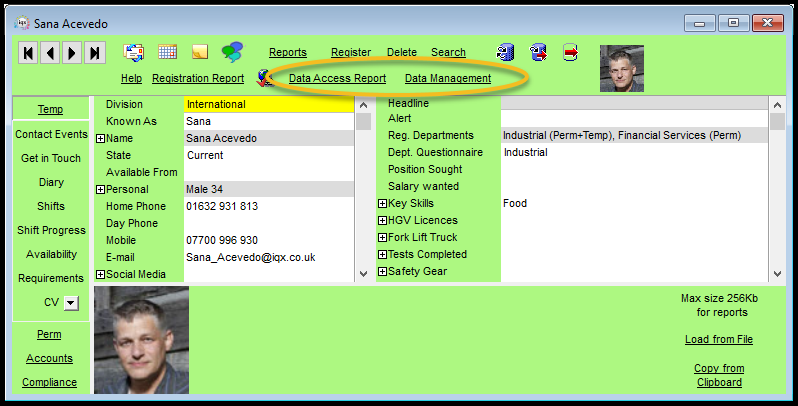
Thumbnail photo on the button bar of the Person form
A thumbnail
of the photo stored in Person – Photo can now be displayed on the top right hand of the Person form for ease of viewing when videoing through candidate records.
New Column on Expiry Dates View – Shifts After Expiry
A new column has been added to the expiry dates view called ‘Shifts after Expiry’. This column shows the number of shifts booked after the first expiry date. This has been designed to assist with booking future shifts before a candidate has been re-cleared on the expectation that the clearance will happen in time.
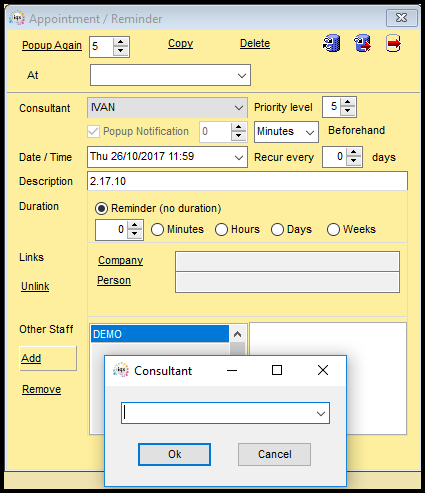
Pop Up Reminders adding other staff
In addition to adding staff when creating a reminder, it is now possible to add or remove staff at the point when the reminder pops up.
Note: Users need to click the Popup Again button again to get a subsequent popup.
Company - IQXWeb - way to Link Head Office to Group Companies
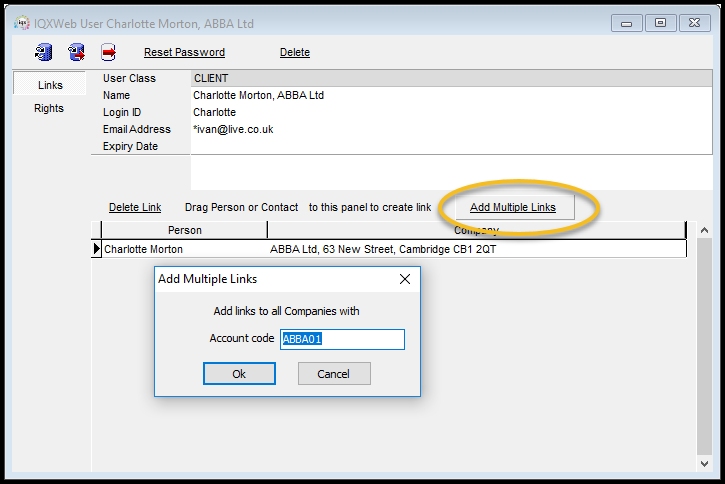
Where there are multiple companies in a group using the same account code and a head office contact needs to see data from all companies a way of adding links to all in one action now exists in the iqxWEB record on the company contact record.
Clicking ‘Add Multiple Links’ will allow the user to enter an account code and link all companies to the iqxWEB record. This will save time with companies that have a significant number of subsidiaries.
An employment record will be added to each company record with a Note of ‘Web User Link’.
Use the Delete Link button to remove a company; the employment record will also be deleted unless contact events exist.
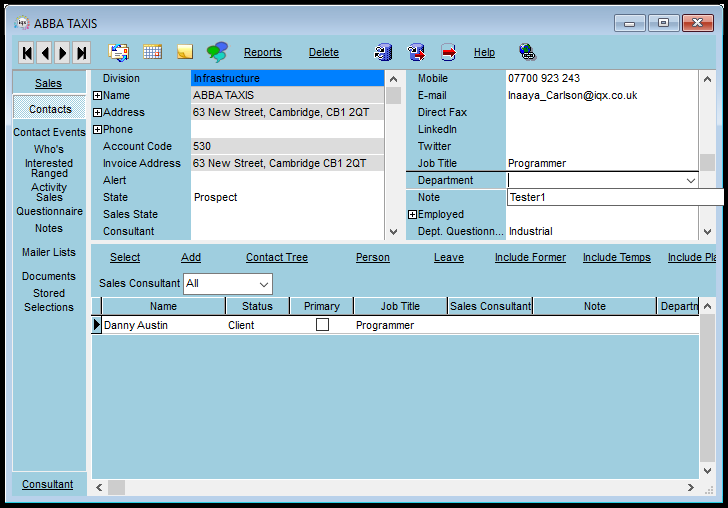
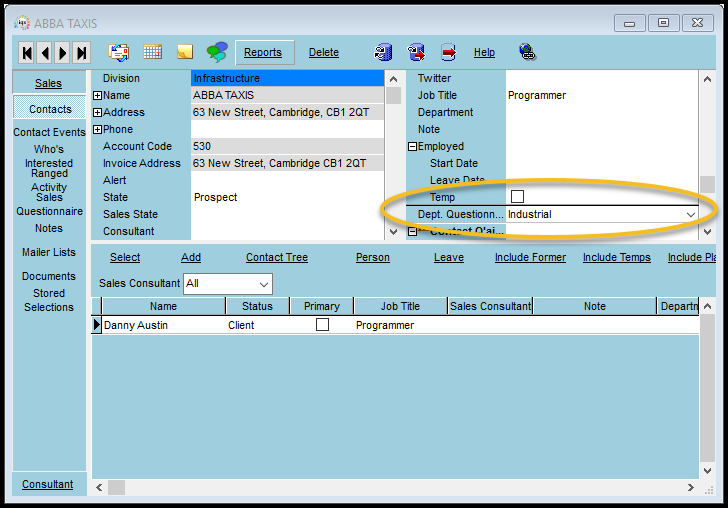
Company - Contact Department
This field has been changed to enable the user to select from a drop down as well as entering free text thereby saving time and ensuring uniformity of spelling. This is similar to vacancy position.
Requires System Administrator setup.
System Administrator
Thumbnail photo on the button bar of the Person form
A thumbnail of the photo stored in Person – Photo can now be displayed on the top right hand of the Person form for ease of viewing when videoing through candidate records.
To activate the thumbnail image set General Setting – Group of Settings - 3040 to Y.
Note if Person – Photo has been hidden in Modify Screen the thumbnail will not display.
Division filtering on Notifications
In Agency Setup – Notifications it is now possible to assign divisions to Notifications. Leaving the Divisions field blank means the Notification is available for all divisions.
Selecting a Division means the template will be available to a user if they are in All or the associated division.
2-17-10-b.png
Note:- Each division needs to have a separate notification template allocated to it if the same template is to be used for more than one division. Alternatively leaving the division field blank allocates that notification to all divisions.
Company Contact add Departmental Questionnaire
In Agency Setup – Departments new Company Contact departmental questionnaire has been added.
Display of the questions is based on the user’s department.
Company - Contact Department
This field has been changed to enable the user to select from a drop down as well as entering free text thereby saving time and ensuring uniformity of spelling. This is similar to vacancy position.
The field description is set in General Settings – Terminology 830 – Company Person Department Name.
The department names are set up in Agency Setup – Contact Department
The choices displayed in Company- Contact right-hand view is limited to the user’s department.
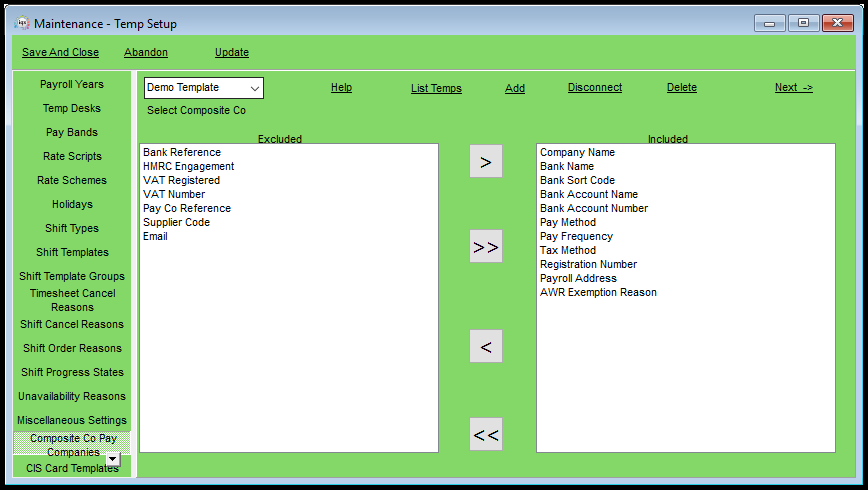
Composite Company Template Maintenance Update
Composite Company Template Maintenance has been updated to bring into line with other approaches such as adding Departments to Shift Order Reasons.
In Temp Setup - Composite Co Pay Companies
To set up a new template:
- Use Add to start a new template.
- Use the arrow buttons to set the fields to be included.
- Use Next → to open the form where you add the values.\\
List Temps will open the person selector and display a list of all temps that are associated with that template.
To modify an existing template, use the arrow buttons to add new fields the use Next to add information to the new fields.
Next → opens the form where you add the values to the selected fields.
Apply will update any changes to the records using the template.
