Shift Confirmations
How to confirm shifts
Standard Method
refers to:
temp desk form → temps tab
vacancies form → diary tab
For a group of shifts - On either the Temp Desk or the Vacancies Diary view – click the Confirm button.
- The Temp Confirmed column could already be ticked, depending on the Template setup.
- Use F2 or click the make contact event button on the top menu bar to start a contact event and select the client as recipient, confirm the candidate with the client.
- Tick the Client Confirmed boxes. Move to the next week, if appropriate, and complete.
- Save and Close. The shifts will now be bordered in black to show completely confirmed.
- To confirm an individual shift from the vacancy Diary view - RIGHT click on the shift and select Client confirm.
With Notifications Set Up
The Notification system provides a mechanism for clients, candidates and secondary agencies to be notified of key events relating to vacancies, placements and shifts by means of HTML email and SMS text.
Notifications can be sent automatically on booking a shift, after selecting your temps when you press the finish button a new window will open with the confirmations in them; one for the Client confirmations and one for the Temp confirmations.

You can press Send All and send the confirmations as they are or you can make changes to individual notifications and then send those. (Note if you make changes to the notification but don’t send it these changes will be lost when you move on to the next one.)
- Template: If you have more than one template set up you can select which one you want to use from the drop down.
- Create Contact Event: if this box is ticked a contact event with the details of the notification will be recorded against the vacancy and linked to either the temp or the client contact
- Send: will send just the one notification that is visible in the window
- Send All: will send all of the notifications as they stand with no changes
- < Previous: used to scroll through the notifications
- Next >: used to scroll through the notifications
- Refresh: keeps the notifications open but DOES NOT save any changes that have been made. If you have made changes to a notification you will need to send it before you can browse to the next one otherwise your changes will be lost.
- Expand: Company, Vacancy, Placement or Person, useful for checking details
- Add: use to add in an additional email address to receive a copy of the notification
- Remove: click on the email address you wish to remove to highlight it then press remove. Useful if your contact has more than one email address but you only want to send them one notification.
- File: you can browse to and select a file that is saved on your computer or network
- Document: use to pick up documents that have been saved on the documents tab of the person, company, placement or vacancy
- Remove: click on the document you want to remove to highlight it and remove it
- Edit: will allow you to amend the body text of the notification and the subject line. Note the default for the subject line
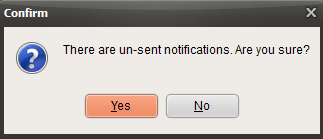
If you try and close the window and you haven’t sent all of the notifications you will receive this warning message:

Once all notifications have been sent the window will automatically close. The process can then be repeated for the next vacancy.
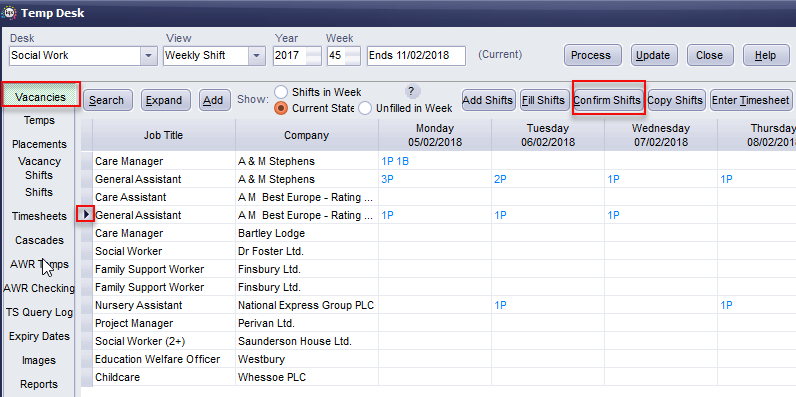
Alternatively you can send confirmations from the Vacancy tab of the Temp Desk. Open the temp desk and on the vacancies tab ensure the correct vacancy is selected (click on the vacancy line and the black arrow will be pointing at the selected vacancy). Press the ‘Confirm Shifts’ button.

If no shifts appear press the include confirmed button (some shift types are set up so that the client or the temp does not need to confirm them). You will see a list of shifts for that week (the date is shown at the top left of this screen. If you wish to confirm shifts for more than 1 week change the number of weeks in the Week(s) field).

If the shifts that you want to send a notification for have already been ticked as Client Confirmed or Temp Confirmed either untick the box and retick or press the None button above the column then Select All if you want to send for all. This will tick the corresponding box in the Notify Client or Notify Temp column.
If a notification has already been sent for this shift then the background of the Client Confirmed or Temp Confirmed will be coloured the same colour as the Temp Desk. Notifications can be resent by unticking and re-ticking.
When you press Save and Close a new window will open with the confirmations in them; one for the Client confirmations and one for the Temp confirmations. The process for sending is the same as above.
Back to Online Users Guide